Lancer NPC - Bombard
Core Detail Overview
Stats
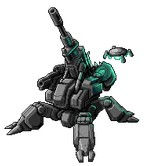
The Bombard has the stats of a howitzer that can nominally move, with high Engineering, E-Defense, and Sensors; low Agility, HP, and Armor; below-average Hull and Evasion; above-average Save Target, average Systems and Heat Cap, and terrible Speed. When one considers that most incoming attacks will be facing Resistance and its main weapon is a Blast AOE with Arcing that lets it sit behind hard cover without worrying much about line of sight, the low HP and Evasion often end up boosted in practice, while the high E-Defense and Engineering help protect it against tech attacks and Burn stacks, so its only general weaknesses are being vulnerable to close-range damage and having abysmal mobility. Since the Bombard mostly wants to just sit somewhere in the distance and show off having a higher gun-to-mech ratio than the typical Barbarossa build, these stats suit it well.
Base Systems
Bombard Cannon is the defining feature for the Bombard, even more than the Chain Axe is for the Berserker; one of its other three base systems and three of its five optional systems are exclusively about making it better, with another base system focused on that as well. Due to being superheavy and having the Ordnance tag (along with the Bombard lacking any protocols), most of the Bombard’s turns should start out with a Barrage to fire the Bombard Cannon, which leaves it with very little action flexibility. Add in the built-in 1 Difficulty and having only decent base damage by Skirmish standards, and it can seem lackluster despite the huge Range, above-average bonus to hit, Arcing tag, and Blast 2 AOE making it fairly easy to target any single character without worrying about cover on most maps. And indeed, the Bombard Cannon is not a good weapon for isolated targets, but since the PCs are usually not operating alone, that’s not a relevant assessment in most actual situations, though going further into that is a matter for Cluster Munitions. Sticking with the Bombard Cannon itself, the main issue is the 1 Difficulty effectively grants all targets soft cover (or upgrades them to hard cover, if they had soft already), making it somewhat unreliable; allies that can cause Prone, Stunned, or other effects to grant extra Accuracy to the Bombard’s attacks are some of its best teammates, as the above-average bonus to hit makes the Bombard Cannon much more threatening if it can at least negate any Difficulty. Also, for a Bombard with more than 1 Structure, there is the issue of potentially losing the Bombard Cannon on taking Structure damage. It’s not as bad as with the Berserker because the Bombard does have a System-tagged ability in its base systems, but it’s still a 25% chance on taking Structure damage to lose its entire identity and purpose if it doesn’t have a way to protect this weapon. While the Bombard can at least provide some support with its generic Quick Techs, it’s still going to feel like a wasted NPC if it loses the Bombard Cannon.
Cluster Munitions is the real grease behind the gears for the Bombard, increasing its damage to all targets for each additional target in an AOE attack. Note that “targets” includes drones, deployables, and other objects (there is an argument for it to also include spaces, but I think that’s stupid), and it also doesn’t care if the target has immunity; anything that the Bombard can try to hit in one shot makes everything in that shot take more damage. Since there is no limit to how much this effect can stack aside from the AOE size, this gives Bombard Cannon (or either Ultra weapon) the highest potential total damage of any NPC weapon. Realistically, though, between the players usually learning how this works quickly and the innate Difficulty of the Bombard Cannon itself, I find it’s rare to connect on more than three total targets (including drones, NPCs, etc.) unless the players made a major blunder, so don’t except the Bombard to suddenly make all other damage-dealer NPCs obsolete. That said, being able to help pump up Cluster Munitions is one of the main determining factors in whether another NPC works well with the Bombard, and there are very few other NPC abilities more effective at discouraging a PC deathball.
Earthshaker Shells lets the Bombard Cannon have some extra utility on occasion, granting it an AOE chance to Prone in an even larger area than the actual attack hits and leaving behind some hard cover. Note that, as-written, it’s ambiguous whether the Earthshaker Shells take effect before or after the Bombard Cannon shot, but the interpretation I use is that the Bombard Cannon attack happens first, because my reading is strict that only protocols can be done before an Ordnance attack and Earthshaker Shells is a free action, not a protocol; letting the Earthshaker effect happen first would make it even better because there would both be a chance to knock targets Prone to offset the innate Difficulty and potentially two extra targets triggering Cluster Munitions from the hard cover objects. Even without that benefit, though, this is quite good. The Bombard’s above-average Save Target helps compensate for it being a Hull save, and since this should pretty much always target multiple PCs, it’s common to knock at least one or two Prone. In the best case, other NPCs can take advantage of both the Accuracy that Prone provides and the hard cover created by the Earthshaker, but at worst, it at least tends to slow down PC mobility enough for the next Bombard Cannon shot to be another big one (especially if the created objects make for even more Cluster Munitions extra damage). Being Recharge 6+ means I don’t expect to use this more than once per combat (possibly unless the Bombard is an Elite or Ultra), so I try to be selective about when I use it rather than taking the first opportunity. Do be mindful that this must be centered on the same space that the Bombard Cannon targeted and its AOE extends an extra space in all directions (Burst 3 vs Blast 2), so if there are other NPCs just outside of the Bombard Cannon AOE, they do risk getting knocked Prone by this, which can backfire badly since PCs will usually have better Hull than NPCs. While this does give a little control aspect to the Bombard, I don’t think a single AOE chance to Prone and two pieces of Size 1 cover is enough to really make the Bombard capable of fulfilling that sort of role compared to the Rainmaker or Sniper (as other artillery NPCs with some control potential); on its own, this is more about setting up for a follow-up offensive than about being able to slow the PCs.
Siege Armor gives the Bombard the best potential durability of any artillery NPC by effectively doubling its HP pool against attacks outside of Range 3. Note that, while it doesn’t reduce damage that isn’t from attacks (such as damage from grenades or Burn ticks), it isn’t restricted to just ranged attacks; any direct-damage tech attacks or melee attacks from beyond Range 3 will have to deal with the Resistance. The protection from Siege Armor isn’t absolute, since it can be negated by Shredded or damage that cannot be reduced on top of its minimum distance, but it will tend to work more often than not, as long as the Bombard has some allies keeping the PCs from getting too close.
Optional Systems
High-Impact Shells may be the strangest knockback effect on an attack in Lancer, since it explicitly knocks the targets away from the Bombard instead of from the source of the attack (the space targeted by the Bombard Cannon). Aside from that quirk, though, there’s no save or additional attack required to trigger it, so it’s as reliable as the Bombard Cannon shot itself. Three spaces of knockback is substantial, and considering how far away the Bombard is often attacking from, it can quickly add up to multiple additional turns of movement spent by the PCs, making this a good choice to compliment Earthshaker Shells for a more artillery/control-hybrid approach. Note that, unlike the Knockback tag, this is a mandatory effect as-written, so if you like using friendly fire for more Cluster Munitions damage, this is also going to displace any allied NPCs that the Bombard Cannon hits. Due to the Bombard Cannon being a superheavy Ordnance weapon, the potential for this to help the Bombard itself is rather limited (aside from the obvious benefits of keeping PCs generally further away), but allies that make heavy use of hazard zones (such as the Hive, Lurker, or Seeder) or that benefit significantly from breaking up the PC formation (such as the Barricade, Berserker, or Specter) can appreciate it. This is best for sitreps where the PCs want to hold a control point (like Gauntlet), but even when that isn’t the case, it brings high potential to be disruptive. I like it in particular against PC compositions that use a lot of Armor, since those mechs both tend to have lower Speed (thus suffering more relative effect from the knockback) and don’t care much about Cluster-Seeker Bombs (my usual favorite optional).
Bunker Buster is a very situational ability. By default, objects have 10 HP per Size, so this will generally clear the whole AOE of the Bombard Cannon shot of any regular Size 1 or 1/2 objects/terrain (note that drones are characters, not objects, so this does not effect them) while taking a decent chunk out of larger ones, going up to clearing out most Size 2 or smaller objects in Tier 3. The Bombard itself largely doesn’t care about cover (and most cover that is effective against it comes as a passive effect from a talent [like Combined Arms 3], frame trait [like Vent Heat from Sherman], system [like Hive Drone from Balor 1], or terrain that aren’t destructible objects [like the smoke clouds from Pattern-A Smoke Charges]), so this isn’t usually a big deal for it, but it can be useful for allies that rely more on line of sight (like the Sniper or the Witch) or that have trouble moving around objects (like the Demolisher or the Pyro). If the PCs make use of strong deployables (like Perimeter Control Plate from Black Witch 2 or SMOKESTACK Heat Sink from Kidd 3) or the map offers them extensive cover (as suggested for the Holdout sitrep), this can be the difference between taking those objects out in one shot or two. That said, I think this is usually too situational to be worthwhile over other good options, so unless the rest of the NPC composition can benefit a lot from this, I think it’s generally not worth the opportunity cost of giving up High-Impact Shells or Cluster-Seeker Bombs.
Flare Drone is a potentially-good ability that’s largely wasted on the Bombard. This is one of the few drones that can be deployed outside of Sensors, being able to cancel Invisible is great, and granting the Bombard +1 Accuracy in its AOE is also great. However, because Bombard Cannon is a superheavy Ordnance weapon, this can’t be used on the same turn as a shot unless the Bombard can overcharge (and even then, by the way I rule Ordnance’s interaction with free actions, it could only be used after the shot). Unless the other NPCs are very good at keeping the PCs pinned in its effect, that extra Accuracy is largely a theoretical benefit since it applies only to the Bombard who deployed the drone. This could give the Bombard something to do if it’s Jammed, and it can be worth giving up a Bombard Cannon shot if this is the best way for the NPCs to counter an Invisible PC, but it’s typically hard to find space for this compared to doing another Barrage. Similar to Bunker Buster, it is good in its ideal situations, but those are generally not common enough to give up High-Impact Shells or Cluster-Seeker Bombs.
Repeater Cannon is mostly just a sacrificial weapon to protect the Bombard Cannon from loss due to Structure damage. Being Ordnance is already pretty bad, but then it also has less bonus to-hit than the Bombard Cannon, has lower damage than the Bombard Cannon, doesn’t benefit from the Bombard’s other abilities aside from Cluster Munitions and Flare Drone, and is realistically only getting used once because of the Loading tag. There are very few situations where this would be more useful than a High-Impact Shells Bombard Cannon shot, before even considering that the latter can used much more often because it’s got Range 25 instead of Cone 5 and has Arcing instead of Loading. It can’t even be used against an enemy that’s Engaged with the Bombard because of being Ordnance. The Cone AOE can occasionally be more advantageous than the Bombard Cannon’s Blast 2, but because the Bombard can’t move and fire this on the same turn (and this would need to hit at least one more target for Cluster Munitions to bring its damage up enough to match the Bombard Cannon), that’s not a very practical benefit. Repeater Cannon is one of the few NPC weapons I would say is worse than the Bastion’s Rotary Grenade Launcher; not even Supreme Maintenance helps this much because an Ultra Bombard wanting a weapon to Skirmish with should be using one of the Ultra weapons instead. Treat this like an NPC version of Armament Redundancy from Dustgrave.
Cluster-Seeker Bombs is my favorite Bombard optional system. The only negative about this is that it’s a separate instance of damage from the Bombard Cannon shot itself and so Armor applies against it in full effect. Aside from that, it’s effectively like giving the Bombard Cannon a Reliable tag on miss and another trigger of Cluster Munitions on hit against up to three characters (so it can damage drones but not objects) of its choice that were in line of sight of the target space, even reaching a space outside of the Bombard Cannon AOE. There isn’t much nuance or subtlety to this; most of the time, it’s just a little more damage for free while doing what the Bombard usually wants to do, and it’s arguably a better soft counter to Invisible or high-Evasion PCs than Flare Drone because it doesn’t stop being able to still Barrage. Fairly simple, almost always effective.
Templates Overview
Grunt Bombards are unfair if deployed en masse, especially if the PCs don’t have any mechs with good Sensors; the Bombard Cannon might be the best NPC weapon at keeping its user too far to touch, at which point each Grunt is basically the same as a whole Bombard. They’re good, but I’d generally suggest either using them in waves or having a map where the PCs can get some total cover for relief from the bombardment so that it isn’t just a matter of dice luck to survive. On the other hand, RPV Bombard is a big slot machine; Bonus HP goes nicely with Siege Armor, and Vulnerable To Tech isn’t too scary when the Bombard has good E-Defense, but being Impaired permanently makes every Bombard Cannon shot a gamble unless there’s a lot of ally support to grant Accuracy or cause Stunned.
With multiple ways to gain Accuracy to attacks (and even gaining AP to negate the weakness of Cluster-Seeker Bombs), Mercenary is a great fit for the Bombard. Scout Drone even works as an alternative to Flare Drone because it can be moved as a protocol and being limited to Sensors isn’t a big issue for the Bombard, though requiring an initial quick action to set up and being Limited 1 do hold it back a little. Favors Owed is largely unnecessary compared to just doing a Bombard Cannon Barrage (though it can be used together with Scout Drone or Flare Drone to have one lower-damage turn to hopefully set up future success), and I’m not fond of Last Word because a Bombard that has a PC adjacent to it is probably soon to be dead already. Pirate doesn’t bring much since the innate Difficulty on the Bombard Cannon interferes with getting Deadly to work reliably, but Slaver Signal is a good use of the Bombard’s Save Target if the PCs are spreading well to avoid Cluster Munitions. Speaking of reliability for the Bombard Cannon, Exotic is a good way to get that, with Paracausal Weapon to make its damage unavoidable (though this would not benefit Cluster-Seeker Bombs, by my interpretation) and/or Chronotorus to help offset the innate Difficulty against one target per round. Spacer doesn’t bring much of note beyond the comedy of Concussion Gun arguably being better than Repeater Cannon.
With its bad Speed, Size 1, and lack of abilities that care much about its Size, the Bombard doesn’t get much value out of either Ship or Vehicle templates. The former can let it fly high enough to prevent most PCs from getting inside the minimum range of Siege Armor, but aside from that, the Bombard usually works much better as a rider than as a carriage.
Commander is a solid pick for the Bombard; its good E-Defense makes it a fine anchor for Bolster Network, Quick March can be used to get an ally out of (or into) an incoming Bombard Cannon Barrage, Press The Attack is a nice reaction to get another attack as a reaction (even at halved damage; note that it does not have any line of sight requirements), and the Bombard is stationary enough for Military Discipline to give a reliable boost to any other NPCs in its nest; Press On is the only bad option because of requiring a quick action. Veteran is mostly attractive for extra defensive traits like Legendary or Lightning Reflexes, though Limitless gives the Bombard a way to actually use some quick actions like tech attacks or Flare Drone without interrupting its usual Barrage spam. Elite and Ultra are naturally very strong for an NPC that exerts a large area of effective range; Siege Shield is entirely redundant with Siege Armor (and Resilient is nearly so), Superior Targeting is mostly redundant with an Arcing Blast weapon, and I’d avoid Ultra optionals that require actions to use aside from a weapon (note that Cluster Munitions will work with other weapons, though High-Impact Shells, Bunker Buster, and Cluster-Seeker Bombs are exclusive to the Bombard Cannon), but the defensive optionals are all reasonable, and Lead The Charge can add some unexpected potential to kite because the Bombard has no other reactions to use by default.
General Use
Overall, the Bombard is pretty much tower defense as an NPC, barely moving while launching shells all over the map. There is depth and skill to using it effectively, but much of that comes from understanding how it fits with the rest of the NPC team composition, how the map terrain and sitrep objectives will influence how the PCs move, and how to make good use of its flexibility in target selection. As a unit on its own, the Bombard is a damage threat that is difficult for PCs to avoid entirely without some reliance on dice luck, but good positioning on their part can limit the potential for Cluster Munitions, without which the Bombard’s damage is low by Barrage standards. Finding ways to consistently build up the extra damage from Cluster Munitions is key to making the Bombard earn its place.
In general, having a long-range superheavy Arcing weapon makes the Bombard’s choice of actions easy; unless there’s a compelling reason not to, it’s going to open with a Bombard Cannon Barrage and then maybe move a little before ending its turn. Placing the shot to hit as many enemy targets as possible while minimizing how many them have cover from the attack and avoiding friendly fire is usually going to dictate where to aim. Throw in Earthshaker Shells if there are other NPCs in position to potentially take advantage of knocking some targets Prone (or if the cover created by that can be placed somewhere very inconvenient, like blocking off a choke point), don’t forget to use the passive extras to the Bombard Cannon from optional systems, and that’s about all there is to general Bombard use. There are other considerations to target selection (like cases where the movement from High-Impact Shells can be more important than maximizing damage, when it can be worth taking some friendly fire for more damage on the PCs, when it’s worth taking a lower-damage shot that can cause Structure damage, etc.), but at a basic level, just learning to recognize the best opportunities for Cluster Munitions will go a long way towards giving the Bombard a high floor of effectiveness.
Different sitreps don’t change much about the Bombard because the combination of a superheavy Ordnance weapon and bad Speed leaves it with a limited variety of things it can do on most turns. Sitreps with a single control point (like Gauntlet or Holdout) can work in its favor by keeping the Bombard away from the control point to benefit from Siege Armor while punishing clustering by the PCs, but its long range and freedom from line of sight means it can usually just sit around some edge of the map or behind some large hard cover and bomb away regardless of what the sitrep objectives are. High-Impact Shells gains some extra value in sitreps about holding control points (like Control) or moving across the map (like Extraction) because 3 spaces of knockback is fairly high; just remember that it is both a mandatory effect and always away from the Bombard itself, so clever players can find ways of setting themselves up to neutralize or even benefit from it.
Compositions of Note
Generally, the main things that the Bombard wants from allies are for them to keep PCs away from it, provide Accuracy, and/or compel the PCs to cluster. If they can also be threatening enough to take attention away from it, all the better.
Among strikers, the Specter might be the best fit for all of that, with its main weapon’s damage doubling against targets who don’t have anybody adjacent (and Threat 3 lets it safely hit someone at the heart of a Blast 2 AOE), the potential to keep an isolated target Stunned with Drain Systems, a fondness for using Ram on Size 1 or smaller PCs, generally needing more than one PC to deal with its Tactical Cloak, and being able to tie up PC reactions on Prepare if they don’t have better answers for Prowl. The Assassin encourages at least its Mark target to keep a friend nearby, plus Leap, Sap, and Spinning Kick can grant Accuracy to allies, while the Bombard’s Earthshaker Shells can enable Heated Blade and provide cover that it can easily jump around as needed; just mind that its melee reach is only Threat 2 and Explosive Knives would be counterproductive to encouraging clustering. The Scourer can also hit similar notes; while it doesn’t have anything quite as direct as Hunt or Assassin’s Mark, Focus Down makes it dangerous for a PC to try fighting it alone (especially if it also has Supercharged), and the innate Accuracy on Thermal Lance gives it some freedom to throw out Lock On for allies. While the Cataphract is decent in a one-on-one situation, it lacks the offensive threat of the prior three, and using Impale and its movement to drag the PCs together instead of using it to isolate one tends to go poorly with Point-Defense Shield, so I find it’s usually not a good fit with the Bombard. The Breacher can be a surprisingly good ally, on the other hand, since the rapid attacks of Dual Shotguns naturally favors Prone over Lock On (whether from Earthshaker Shells, Breach Ram, or its own Ram attacks), Breach Ram lets it go right through any cover created by Earthshaker Shells, Threat 3 on a high-damage weapon can discourage spreading out after it has engaged, and Break Armor threatens exactly the sort of low-Evasion/high-Armor frames that the Bombard tends to be less effective against. For some shenanigans to boost Cluster Munitions, the Ace is a great partner, combining good Evasion with the safety net of Barrel Roll in case of a hit, and Rapid Response can let it further reposition outside of its turn to either trigger Cluster Munitions or get out of the way, but my favorite for that is the Berserker; not only does its Armor and Stampede Defense help to dampen getting hit, but Aggression (especially if it has Retribution as well) turns the Bombard into a single-target spike damage threat (dealing anywhere from 14 to 31 damage depending on Tier and optional systems, assuming only two targets for Cluster Munitions), plus the natural counter to being focused down with Aggression and Avalanche Charge is for the PCs to gather around the Berserker, which feeds into more Cluster Munitions.
Controllers almost all go well with the Bombard. The Hive is probably the Bombard’s best partner overall, since it’s not too difficult to set up character piles for Cluster Munitions with the positioning control of Drone Barrage and/or Driving Swarm, its Burn damage is a counter to high Armor, and Grind Maniple stacks well with Earthshaker Shells and/or High-Impact Shells to limit how much the PCs accomplish on their turns. The Archer is a substantial damage threat that can punish PCs caught in bad positions with Suppress and/or Hail of Fire, move outside of its turn with Rapid Response to escape an incoming AOE (ideally with a PC baited into the danger zone as well), and hamper long-range responses with Blinding Shells and/or Impending Threat; its only ability that doesn’t go well with the Bombard is Covering Fire. The Barracide can use Mobile Printer (especially with Extrudite) to both restrict PC movement and provide additional targets for Cluster Munitions, while Graviton Lance, Drag Down, Seismic Repulsor, and Titan-Snare Drone can all make it harder for the PCs to stay spread out. The Seeder fills a similar role, trading the extra damage from sacrificial cubes for a bevy of invisible mines to make the PCs wary of spreading out, a weapon with Knockback 1 to help keep the PCs grouped, and Grav Spike for more direct positioning control. The Witch doesn’t have as much to directly help the Bombard, but it still draws fire from being a massive threat on its own, can disable a ranged attacker with Blind, can restrict movement with Chain and Petrify, and causes Exposed often enough that even “bad” Bombard Cannon shots are still painful.
Supports like having a high-damage NPC to boost, so they also tend to do well with the Bombard. The Aegis can turn any spot into a fortified position with Defense Net, potentially with Guardian (which is harder to flank around from long distances) and/or Hardlight Cover System to give even more cover; just mind that this would also double-down on the weakness to close-range PCs for both Defense Net and Siege Armor. The Mirage is fantastic at compensating for the Bombard’s low mobility by using Glitch Scanners/Blip to move it around as desired, Dataveil/Illusory Subroutines can stack Invisible on top of Siege Armor, Manifest False Idols gives it even more control over NPC positioning, and Multiplicity can keep the Bombard safe from any one attack per round while also moving it to reactivate Siege Armor. The Scout can also provide Invisible via Cloaking Field or Dataveil, loves to hand out Lock On and neutralize pesky PC Armor with Shredded (though do note that consuming the Marker Rifle’s Lock On will end Shredded before the attack hits), can stack even more damage on the Bombard Cannon with Expose Weakness (which is worth two triggers of Cluster Munitions, albeit only to one target), and best of all, Spotter can cancel the Difficulty of the Bombard Cannon just for being adjacent. Siege Armor helps to effectively double the Support’s healing if the PCs don’t have a way to bypass Resistance, which also makes the Bombard a fantastic target for Latch Drone. Best of all, though, is the Priest; Investiture grants Accuracy while the Bombard’s good E-Defense mitigates the risk to the Priest and its lack of mobility makes maintaining the link relatively easy, either Fractal Assault or Sanctuary can stymie a PC trying to attack the Bombard, and being only Size 1/2 means the Priest can ride on a Transport Vehicle Bombard while protecting itself with Dispersal Shield (or even using that on both if it also has Empowered Shield) for a way of making a Terran siege tank in Lancer.
Unfortunately, neither defender nor artillery NPCs have much notable synergy with the Bombard. Most defenders are easily avoided en route to closing on the Bombard and lack a means of punishing the PCs for spreading out, though the Sentinel is probably the best fit of the lot, with a Threat 3 weapon to punish movement once it gets close, the ability to set up Bodyguard on the Bombard early on for more overwatch chances, and Punisher Systems or Impaler as ways to further restrict movement. A Vehicle Bastion using Transport (and ideally also Pause Engine and/or Fearless Defender) can help keep the Bombard safe, but it needs further support to stop the PCs from just spreading out. The soft control potential of the Rainmaker (particularly with Endless Rain) or the Sniper (particularly with Selective Loader) can help to set up better Cluster Munitions chances, but it often ends up feeling like they’re just another artillery NPC benefiting from the rest of the NPC composition rather than a good teammate for the Bombard.


Comments