The Process of Painting Nagendra Stalker
- Nov 20, 2017
- 4 min read

It's been a while since I've done one of these posts. I've still been painting, but it's been a bit less frequent than before (blame Age of Wonders 3), and as I hinted at in my workout recap from a couple of weeks ago, I'd been struggling to get the results that I wanted with my second go at painting Lysette. Thus, in an attempt to do something different both to refresh myself and to regain some confidence, I decided to take a crack at doing this Yuan-Ti-looking dude (which came with the added bonus of also serving as practice with doing scales for my eventual try at doing a Marilith-looking chick).
It took me a while to decide on what I wanted to do for the color scheme. The model has a rattle on the tip of its tail, but most real rattlesnakes seem to be shades of brown. That's great in nature, of course, and it might've been a chance to try out doing some freehand for a diamondback pattern, but as I said, I'd wanted to do something to regain my confidence, so I didn't want something that complex. I thought of doing a coral snake pattern next, but again, while doing bands of colors would probably be easier than doing diamonds, it'd be more freehand work than I was looking for at the moment. Emerald boas look nice, though, and I hadn't really done a miniature with a clean green as a major featured color (aside from the orc in the first Learn To Paint kit, I guess), so that seemed like a decent approach to take. I wanted to give a relatively primitive look to it, so that lent itself to painting the armor as leathers, along with the quiver. I wanted some red accent touches to contrast with the green, so the jewels on the left bracer and the sword hilts could be rubies, along with using red feathers as fletching for the arrows. Just for the sake of trying something new, I also thought I'd try to paint the sword blades themselves as NMM.
No need to prime since this was a Bones miniature, so it was straight to starting with the eyes and underbelly scales.


That went pretty smoothly, really. The eyes didn't come out quite identical, but they each looked good enough for me to move on, so the rest of the scales came next, along with a general dirty brown base.

At this point, I would've normally used the Citadel brown ink wash. However, I kind of dislike relying on those so much. There's nothing wrong with them by any means, but I feel like there's something to be said for learning to work with cruder tools first in order to make better use of more sophisticated ones. That's all a fancy way of saying that I watered down my own wash for shading all of those parts.


Once that dried, it was on to highlighting. I'm sure the best painters would do that by highlighting each individual scale, but I don't think there's anything wrong with recognizing that I don't have the fine brush control to do that in any reasonable way at my current skill level, so I just went with some drybrushing. I started out with the base coat colors, then highlighted the underbelly with successively whiter mixes while highlighting the green with successively yellower ones.
I followed that by putting on the base coat for the leathers, because they should be safe from contamination with the drybrushing completed.


I used a darker brown mix as a base coat for the wood parts (the bow, the arrow shafts, and the sword handles), along with a bluish off-white for the wrapping on the bow and the sword grips and bright red for the fletching. I also put black basing on the gems and painted the sword blades with a very light blue/grey mix.


That was all followed by a black wash on everything except for the sword blades.
As mentioned at the start, I painted the gems as rubies. For the small ones on the sword hilts, this was done with a touch of dark red because they're too small for me to do anything more than that with them. For the larger one on the bracer, I actually did proper layering with lighter reds and a reflection spot.
As for the NMM on the sword blades, frankly, I didn't manage to get what I was trying for. I kind of understand the theory behind it, but actually putting it into practice is another matter, of course. The end result doesn't look awful, especially in person, but it's also nothing close to the amazing stuff that I've seen from others. Not that I'm surprised, considering that NMM seems to be one of the harder techniques to do well, and at least it's something that I can work on getting better at in the future.
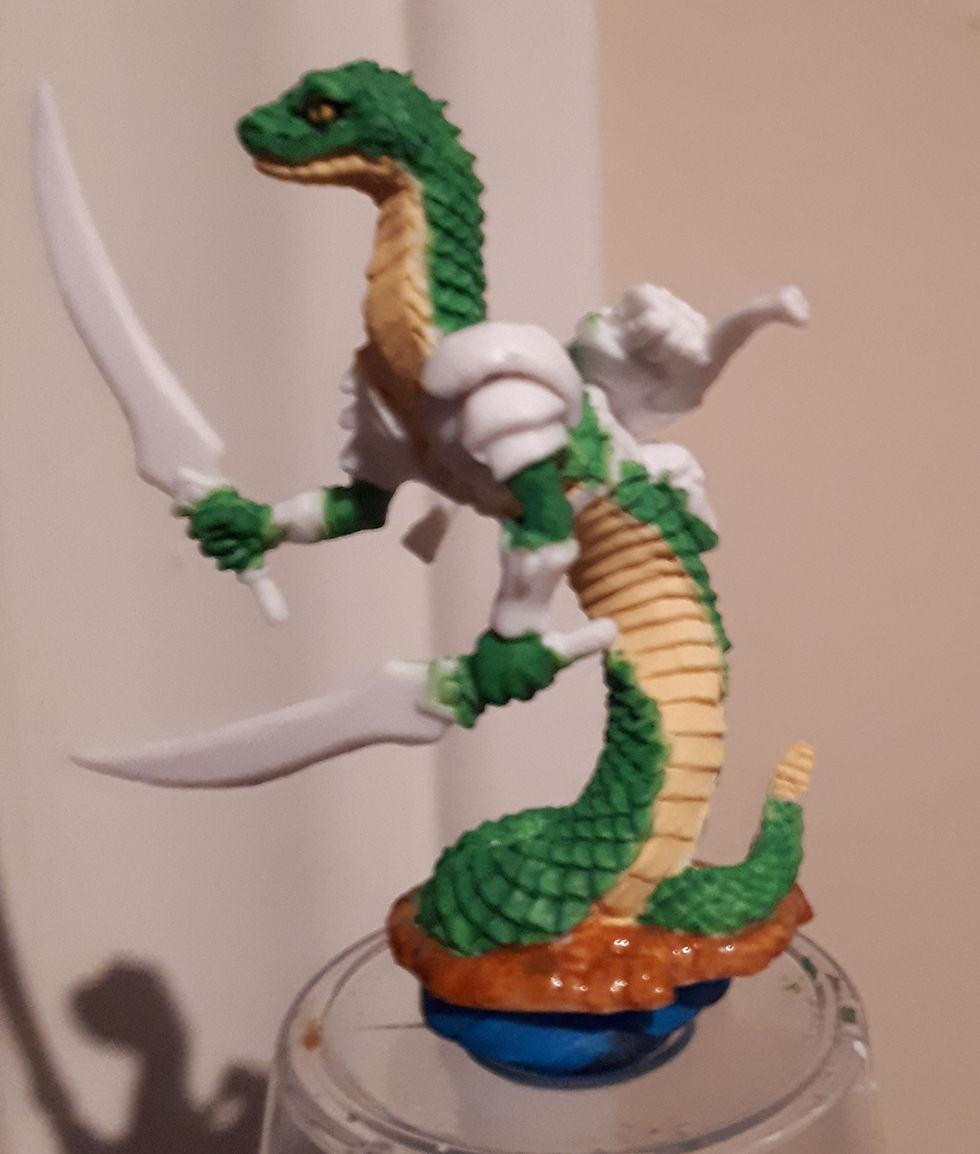
Speaking of end results, though, here are the final pictures.


While it's got some parts that could've been better, I'm still pleased with the overall final product. The scales turned out quite nice, those are some of the best eyes I've done to date, the gem on the bracer showed that I've actually got a decent handle on painting those, and the blacklining around the leather hit a nice balance of being visible without being too cartoonish. The NMM needs a lot more contrast, and I was pretty lazy about highlighting the leather (which is to say that I hardly did anything on those parts after the wash). However, it definitely left me feeling better about where I'd gotten after spending so much time failing to get the results I was going for on my second Lysette.
Up next: probably going back to that second Lysette.


Comments