The Process of Painting Arael, Half Elf Cleric
- Feb 4, 2018
- 3 min read
Well, I sure took my sweet time painting this one. I'd finished the base a week or so after the previous one, but one thing or another kept getting in the way of painting the miniature itself.
But I'm getting ahead of myself. Over the winter holidays, I got a bunch of tools and supplies to base with, and while I'd messed around with adding some little details here and there, this one was when I decided to go all out with making a custom base. Not that I had a particular design in mind, but I had some moss, some cork, some various grits of sand, and some pistachio shells (which I was inspired to use thanks to this great video tutorial). After tearing out an irregular piece of cork that seemed to be about the size that I needed for the figure itself, I layered a thinned mixture of spackle, PVA glue, and sand over the top of the base, followed by supergluing the cork and a shell half onto it in a way that looked good to me. Once it dried, I covered it all in a layer of thinned PVA glue, sprinkled sand over the cork to texture the surface, and then put another layer of glue over it all to seal it in. After giving it plenty of time to dry completely, I primed it black and drilled a small hole for pinning with a pin vise.

After cutting the miniature off of its integral base, I drilled a small hole in the bottom of its left foot and superglued a piece of brass rod in there. At this point, I did a dry test fit, and it looked pretty nice.

I gave the whole base a medium brown coat to start with.

Following that, I started drybrushing it. I wanted to have some subtle depth and variety in the color rather than acting like rocks are only ever grey and brown, so aside from those colors, I also hit it with some red and yellow before finishing with an off-white.


For further variety, I added a brown wash over the cork and spackle.

After that had dried, I glued some pieces of stringy moss in the divide between the cork and the shell, and then I added a light sprinkling of green tea. To seal everything in, I mixed some water, PVA glue, and flow aid, and I sprayed that all over the base using a cologne sample bottle (since I don't have an airbrush).
With the base done, it was (eventually) time to move on to the miniature itself. Despite being named as a cleric, it gave me more of a ranger vibe, so I decided to go mostly with greens and browns, with a typical Aryan elf color scheme and some touches of red for contrast and steel and brass metallics. As usual, I started out with the eyes.

Based on the pose, I wanted to add a bit of a dynamic touch to the eyes, so rather than just facing forward, I tried to make it look off towards the side. Along the way, I also put the base coat on the flesh.

Since I'm going to be flying away soon, I wanted to take a quick route with this, so I just used a brown wash for shading, followed by a couple of highlight layers. I also mixed some red with the base flesh tone to give a pale red for the lips.

Up next was blocking in the major non-metallic colors.


As before, a brown wash was used for some quick shading.

For the waist ribbon-things, I took inspiration from the example painted by Anne Foerster and Derek Schubert in Reaper's store to go with blue. Since there wasn't much texturing to wash on them, I just layered in a little bit of shadowing manually, followed by highlighting everything.

All that was left now was the metallics. I've complained in the past about the poor coverage of metallic paints over Bones material (particularly Reaper's MSP metallics), so I used a trick that I heard about coating them with a dark non-metallic paint first.

After that, it was just a matter of laying down some grey steel and bronze detailing. Since the metallic pieces other than the sword are quite small, I left most of them as-is after painting them, but I went over the sword itself and the sheath with a black wash.

Lastly, it was just matter of highlighting with silver and gold, followed by supergluing it onto the base.
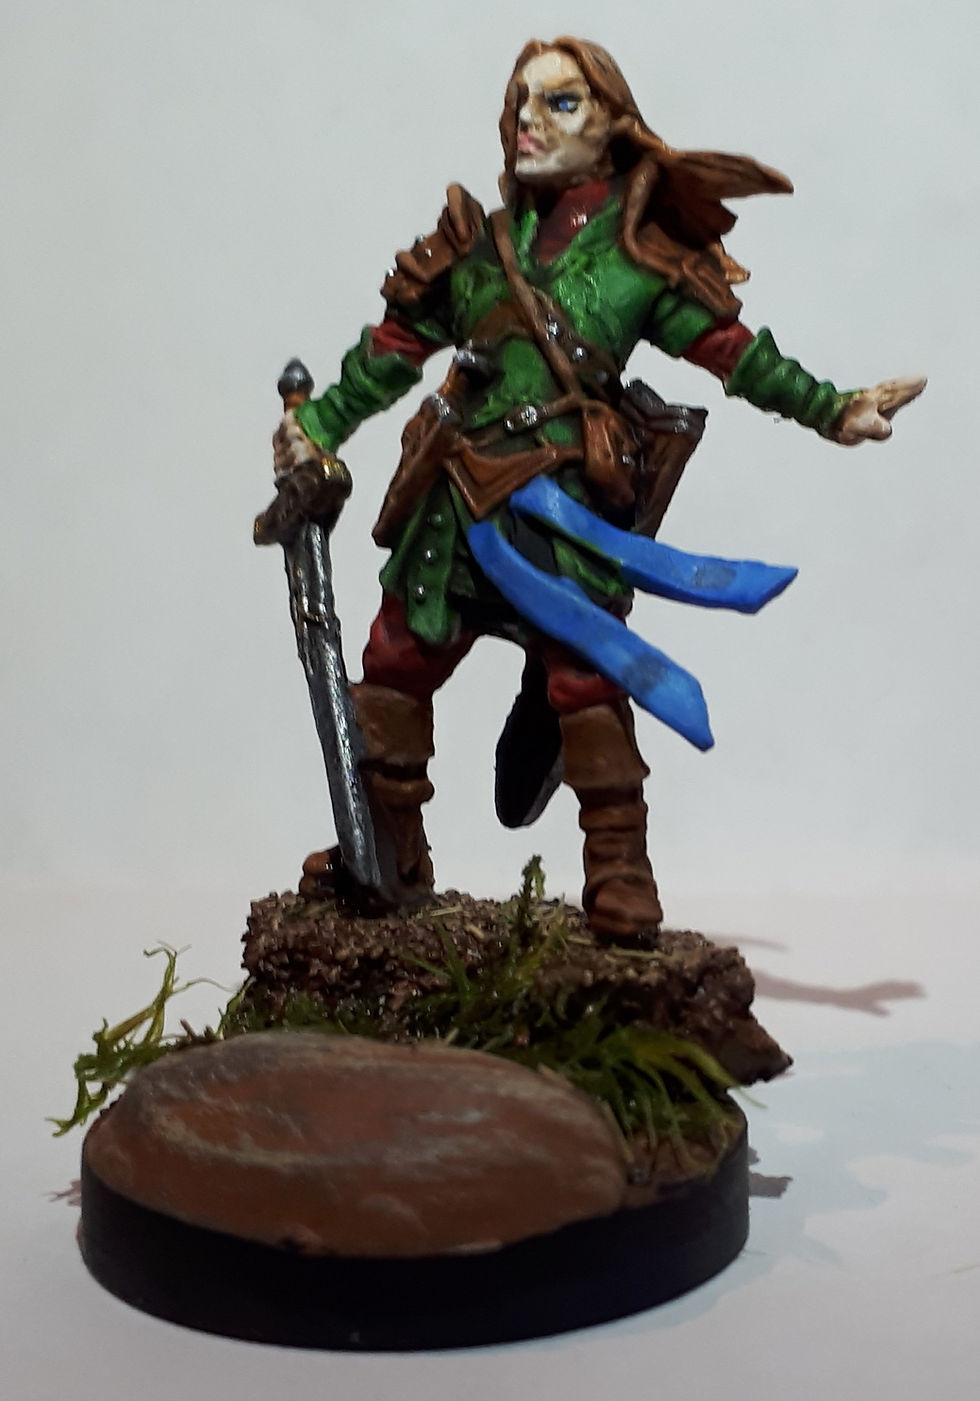
Here are the finished pictures:


I'm very happy with how this one turned out. Certainly, I could've done a little more detailing on the green areas, but all things considered, it was pretty solid.
Up next: I'm not doing any more miniature painting until March (at the soonest), so no plans, other that than I'll continue to work on my custom basing.


Comments